
Nano Banana Pro Product Packaging Mockup Prompts
Create packaging mockups with Nano Banana Pro while controlling dieline proportions, material, label placement, camera angle, lighting, and scene variants.
Quick answer
Start from a clean pack front, dieline, or rough mockup and separate structural invariants from scene styling. Protect package proportions, panels, closures, and artwork zones; then define one material, camera, light, and background for each mockup pass.
Who this guide is for
Brand designers, founders, and ecommerce teams visualizing boxes, pouches, bottles, tubes, or jars before photography, while keeping final print, legal copy, color, and manufacturing review in professional design files.
Recommended model
| Use case | Recommended model | Why |
|---|---|---|
| This workflow | Nano Banana Pro in image-to-image mode | Its reference-based high-fidelity workflow is appropriate when package geometry and an approved visual direction must remain anchored while materials and presentation scenes change. |
AIBase is an independent creative platform. Model names are shown only to identify supported underlying technologies and workflow choices.
Prompt template
Use the uploaded [front artwork/dieline/rough mockup] as the packaging reference. Keep [package dimensions and silhouette], [panel boundaries], [closure], [artwork placement], and [brand color blocks] unchanged. Render the package as [material and finish] in [scene]. Camera: [angle and crop]. Lighting: [setup]. Preserve print alignment and realistic folds, seams, thickness, reflections, and contact shadow. Do not invent or rewrite label copy, claims, barcodes, certifications, logos, or package features.
Step-by-step workflow
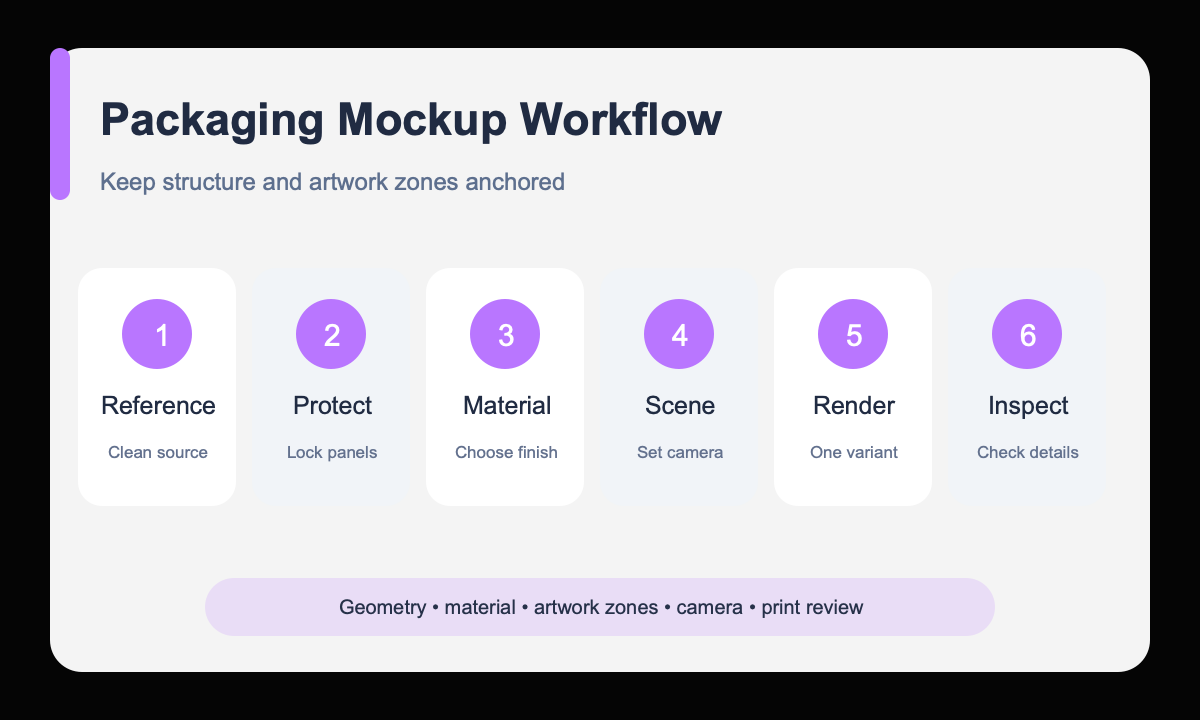
- Prepare a clean reference with obvious package boundaries and remove unrelated presentation graphics.
- List geometry, panel, closure, and artwork zones that cannot move.
- Choose one physically plausible substrate and finish, such as matte paperboard, clear PET, or foil pouch.
- Create the neutral catalog angle before lifestyle scenes or dramatic lighting.
- Generate one scene variation at a time while reusing the same protected reference block.
- Inspect corners, folds, cap alignment, label curvature, copy drift, and contact shadows at full size.
Example prompt variants
- Use the uploaded pouch front as reference; keep proportions, zipper line, logo zone, and coral color block fixed; render a matte recyclable pouch, three-quarter catalog angle, pale gray sweep, soft left light.
- Use the uploaded bottle mockup as reference; keep bottle silhouette, cap height, label rectangle, and navy palette fixed; render frosted glass on a limestone vanity, close hero crop, diffused morning light.
- Use the uploaded box artwork as reference; keep panel geometry and artwork positions fixed; render textured uncoated paperboard on a dark retail shelf, eye-level crop, narrow warm spotlight, no added copy.
Quality checklist
- Package silhouette, scale, panel divisions, closure, and artwork zones match the reference.
- Material behavior is credible at folds, edges, highlights, and transparent areas.
- Label placement follows the surface perspective without warped or invented copy.
- Camera, light, reflections, and contact shadow form one coherent product scene.
- The mockup is treated as visualization, not manufacturing or print proof.
Mistakes to avoid
- Using a cluttered mood board as the only geometry reference.
- Changing substrate, package shape, camera, and artwork in one uncontrolled prompt.
- Relying on generated small text for legal, ingredient, barcode, or claim accuracy.
- Approving the front view without checking side panels, seams, caps, and corners.
Related AIBase pages
- Build a packaging mockup with Nano Banana Pro
- Follow the high-fidelity image workflow
- Compare product image model workflows
Practical next step
Open the most relevant AIBase generator, run one narrow prompt first, and save the best result before adding more constraints. The fastest way to improve output quality is to compare one variable at a time: subject, camera, background, lighting, then final polish.