
Nano Banana Pro Bicycle Saddle Campaign Prompts for Accurate Product Scenes
Create premium bicycle-saddle campaign scenes while preserving saddle geometry, rails, cover material, stitching, hardware, and honest fit claims.
Quick answer
Begin with approved multi-angle saddle photography and a fit-data sheet covering width, rail type, padding, cover material, intended use, weight limit, and compatibility. Use Nano Banana Pro for a controlled text-free scene while protecting silhouette, nose shape, rail geometry, stitching, relief channel, hardware, and finish. Keep comfort, medical, performance, weight, and compatibility claims out of generated pixels.
Who this guide is for
Cycling component brands, bike shops, race teams, and ecommerce catalog teams producing campaign heroes, category banners, and detail-page visuals from real saddle references.
Recommended model
| Use case | Recommended model | Why |
|---|---|---|
| This workflow | Nano Banana Pro | High-fidelity reference-led generation gives more control over technical geometry, matte or gloss surfaces, stitching, and reflections than a generic text-to-image scene. |
AIBase is an independent creative platform. Model names are shown only to identify supported underlying technologies and workflow choices.
Prompt template
Use the uploaded authorized bicycle-saddle reference as the exact product source. Preserve silhouette, length, width, nose shape, rear profile, relief channel, cover material, stitching pattern, side graphics, rail material and shape, clamp zone, hardware, finish, and color. Place it in a text-free [studio / workshop / road-side] scene with [lighting]. Keep [position] for editable copy. No invented bike, rider, fit result, comfort claim, performance claim, weight claim, certification, word, number, logo, or watermark.
Step-by-step workflow
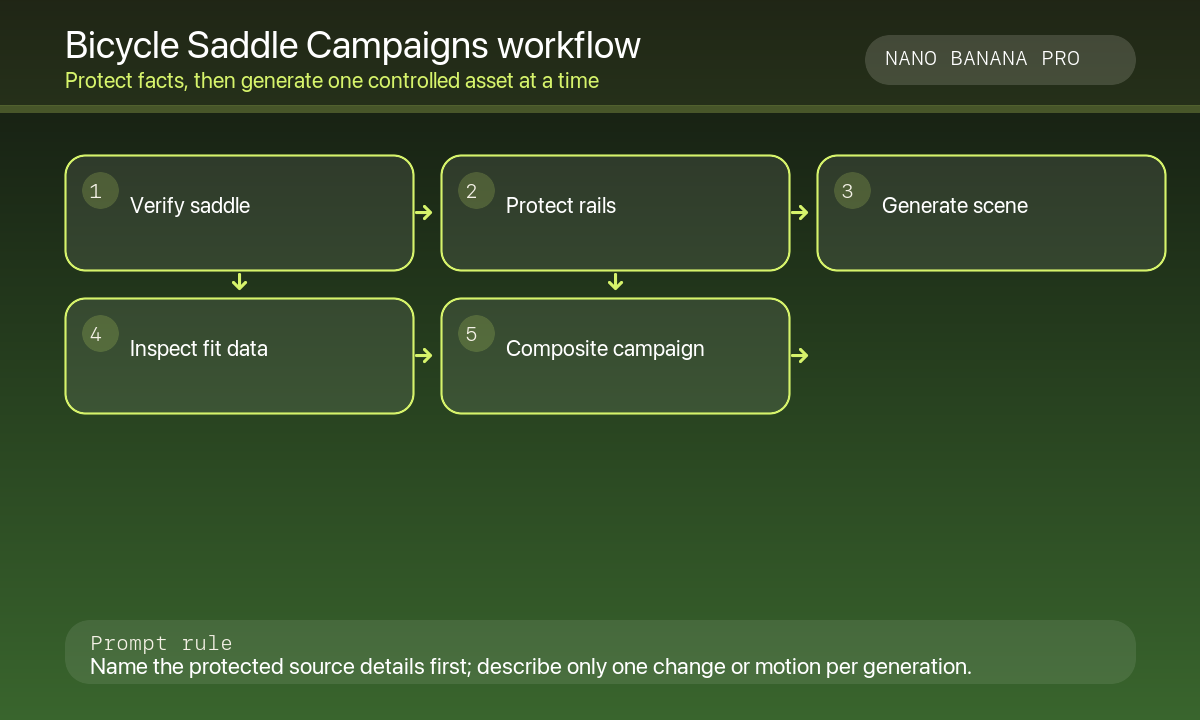
- Confirm SKU, size, rail standard, cover material, stitching color, hardware, weight, intended use, compatibility, and prohibited claims.
- Gather authorized top, side, rear, underside, and detail photographs at the correct production color.
- Protect every identity-defining geometry element before describing the campaign environment.
- Generate one setting and lighting direction at a time; avoid adding an entire bicycle unless that bike is also authorized and accurate.
- Inspect rail curvature, saddle symmetry, stitching, logo scale, relief channel, and shadow direction against the source.
- Composite verified fit, compatibility, safety, materials, price, and shipping copy in editable design layers.
Example prompt variants
- Premium matte-black saddle on a light concrete plinth with cool morning side light, preserve exact nose shape, embossed side mark, silver rails and stitching; no rider, bike, word, or performance cue.
- Text-free workshop scene with the approved saddle on a clean repair stand, warm task light, shallow depth; preserve rails and clamp hardware; no tools that imply included equipment.
- Wide category campaign background with one approved saddle in the right third and quiet left copy space, calm graphite and citrus palette; no road, race, comfort claim, or text.
Quality checklist
- Saddle silhouette, width, nose, rear profile, channel, rails, stitching, hardware, and finish match approved source photos.
- No generated rider, bike, fit position, or terrain implies an unsupported use case.
- Material, weight, compatibility, safety, and performance statements come from verified product data.
- Reflections and shadows do not distort rail geometry or conceal construction details.
- Copy, price, terms, alt text, crops, and approvals are editable and traceable.
Mistakes to avoid
- Letting the model round the nose, shorten the rails, or turn a relief channel into a generic groove.
- Generating a rider and implying comfort, injury relief, speed, or fit compatibility.
- Adding tools or accessories that are not included with the SKU.
- Embedding technical measurements or certifications into generated pixels.
Related AIBase pages
Practical next step
Open the most relevant AIBase generator, run one narrow prompt first, and save the best result before adding more constraints. The fastest way to improve output quality is to compare one variable at a time: subject, camera, background, lighting, then final polish.