
Nano Banana 2 Prompts to Remove Tagging Fasteners from Apparel Photos
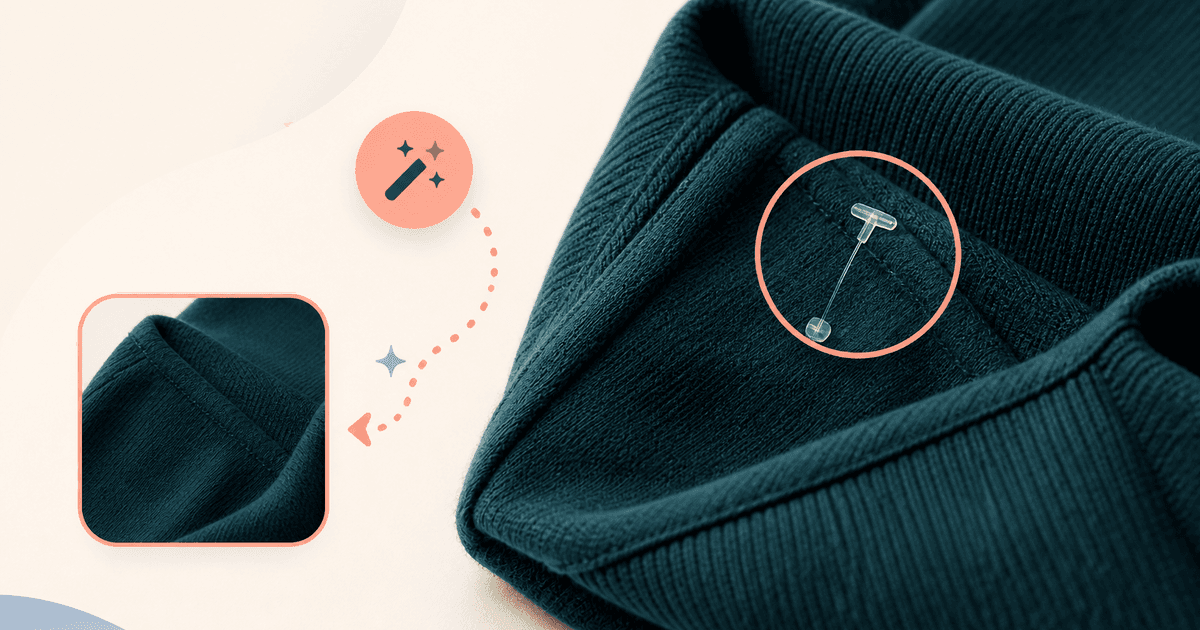
Remove only visible plastic tagging fasteners from authorized apparel product photos while preserving fabric weave, seams, folds, labels, color, silhouette, and honest condition.
Quick answer
Use a tight edit mask around the plastic filament, barb, and exposed connector only. Tell Nano Banana 2 to reconstruct the smallest hidden fabric area from adjacent weave and fold direction, while locking garment shape, stitching, edge finish, print placement, care-label zones, shadows, and color. Do not remove permanent fasteners, security devices, damage, or disclosed condition details.
Who this guide is for
Apparel studios, resale teams, marketplaces, fashion brands, and catalog retouchers cleaning authorized product captures after removable hangtags have been detached.
Recommended model
| Use case | Recommended model | Why |
|---|---|---|
| This workflow | Nano Banana 2 image-to-image for a narrow apparel cleanup | A constrained reference edit is more appropriate than regenerating the garment because the source already contains the approved SKU, construction, drape, and lighting. |
AIBase is an independent creative platform. Model names are shown only to identify supported underlying technologies and workflow choices.
Prompt template
Edit the uploaded authorized apparel photo. Remove only the visible removable plastic tagging fastener: [precise location, color, filament path, barb and connector]. Reconstruct the tiny occluded area from immediately adjacent [fabric weave / rib / knit / print / fold]. Preserve exact garment silhouette, panel geometry, seams, topstitching, hems, buttons, zipper, pockets, hardware, print registration, labels, fibers, pilling, wrinkles, color, exposure, shadow, background, crop, and honest condition. No fabric smoothing, seam repair, stain removal, shape change, logo change, extra texture, invented thread, text, hand, hanger, watermark, or new accessory.
Step-by-step workflow
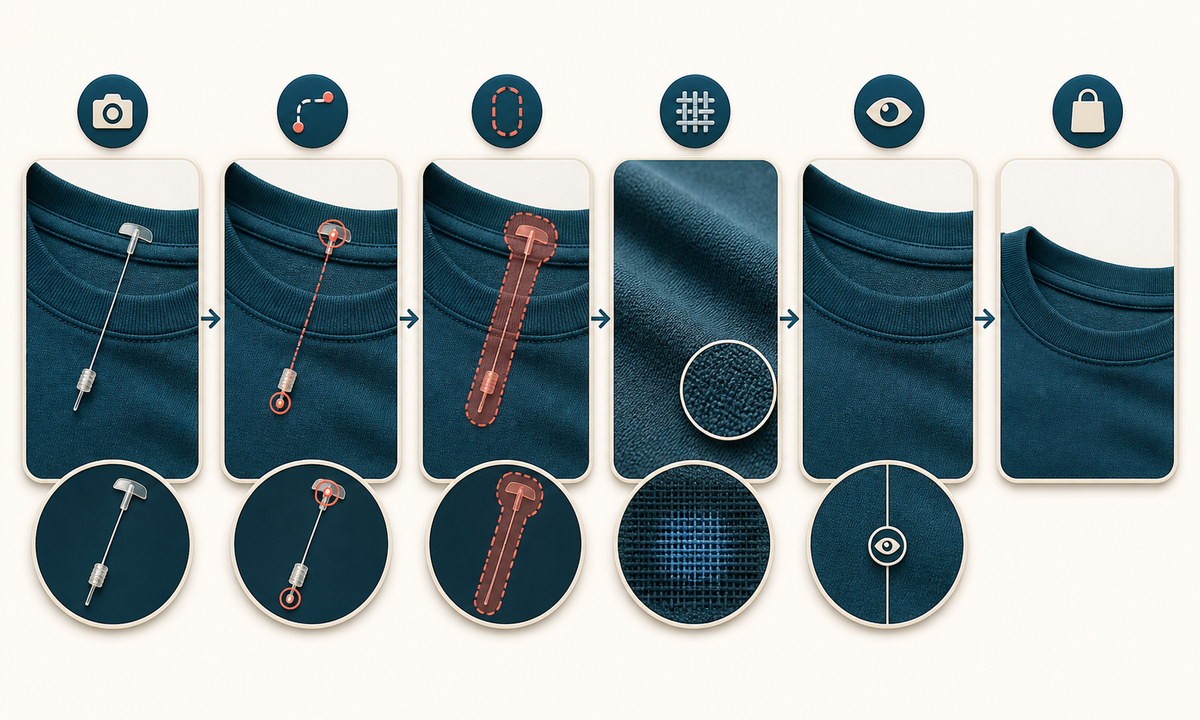
- Confirm the fastener is removable merchandising waste, not a security device, structural tack, repair, authenticity marker, or condition detail that buyers need to see.
- Capture the exact SKU after physical tag removal when possible, then mark the filament, barb, connector, entry point, exit point, and every protected seam, edge, print, label, and defect.
- Crop or mask narrowly around the plastic and specify the local weave direction, yarn scale, fold angle, print repeat, highlight, and shadow that must continue through the repaired pixels.
- Generate one conservative edit without changing the whole garment, model, mannequin, background, or lighting.
- Compare at high zoom and thumbnail size for repeated fibers, blurred stitching, broken print registration, invented holes, smoothed pilling, shifted color, and altered silhouette.
- Keep the original, edit mask, prompt, output, approval, and disclosure decision linked to the SKU and channel.
Example prompt variants
- Flat-lay cotton T-shirt: remove one clear 25-millimeter tagging filament near the neck label, preserve jersey grain, collar rib, shoulder seam, printed neck zone, wrinkles, and soft left shadow.
- Rib-knit sweater: remove the black fastener crossing the lower right cuff only, continue the existing vertical rib spacing and cuff fold without smoothing fuzz, pilling, seam, or color variation.
- Printed silk scarf: remove the tiny clear barb at the outer corner, restore only the occluded two-millimeter motif segment from the adjacent repeat, preserve rolled hem, sheen, drape, and every visible condition mark.
Quality checklist
- Only the verified removable plastic filament, barb, and connector are gone.
- Weave, rib, knit, nap, print repeat, seam, hem, hardware, label zones, silhouette, folds, and honest condition match the source.
- The reconstructed patch follows local fiber direction, scale, highlight, shadow, and depth without cloning artifacts.
- No permanent tack, security feature, defect, repair evidence, authenticity detail, branding, or required disclosure was removed.
- Original, mask, prompt, output, zoom review, merchandising approval, and SKU association remain traceable.
Mistakes to avoid
- Writing ‘clean up the garment’ and unintentionally removing pilling, wrinkles, stains, repairs, labels, or construction details.
- Masking a large region that lets the model redraw a collar, cuff, print, seam, or garment edge.
- Assuming every plastic-looking attachment is disposable without checking security, authenticity, or construction context.
- Publishing the edit without comparing the exact SKU, colorway, size sample, and disclosed condition.
Related AIBase pages
Practical next step
Open the most relevant AIBase generator, run one narrow prompt first, and save the best result before adding more constraints. The fastest way to improve output quality is to compare one variable at a time: subject, camera, background, lighting, then final polish.