
Nano Banana 2 Crop Extension Prompts for Clean Outpainting
Extend a product, portrait, or social image with Nano Banana 2 while preserving the original subject, perspective, lighting, edges, and copy-safe composition.
Quick answer
Start from the highest-resolution source, define the exact target aspect ratio and extension sides, and protect every original pixel that matters. Describe the continuation as geometry, perspective, light, texture, and negative space—not as a new scene—and review the seam, shadows, repeated patterns, and subject edges at full size.
Who this guide is for
Designers, ecommerce teams, photographers, and social media managers adapting an approved image to 16:9, 4:5, 1:1, or 9:16 placements without recropping the subject or rebuilding the entire visual.
Recommended model
| Use case | Recommended model | Why |
|---|---|---|
| This workflow | Nano Banana 2 in image-to-image mode | A reference-led edit can use the original image as the source of truth while the prompt limits generation to the missing canvas around it. |
AIBase is an independent creative platform. Model names are shown only to identify supported underlying technologies and workflow choices.
Prompt template
Use the uploaded image as the exact source. Keep the original subject, face or product geometry, colors, materials, pose, crop scale, camera height, lens perspective, lighting direction, shadows, reflections, and all existing pixels unchanged. Extend the canvas on [left/right/top/bottom] to [aspect ratio]. Continue only [background surface/environment] with matching [texture, perspective lines, depth, light, grain]. Reserve clean negative space in [area] for layout. No subject resizing, duplicate object, new person, invented text, logo change, warped line, repeated texture patch, hard seam, new light source, or watermark.
Step-by-step workflow
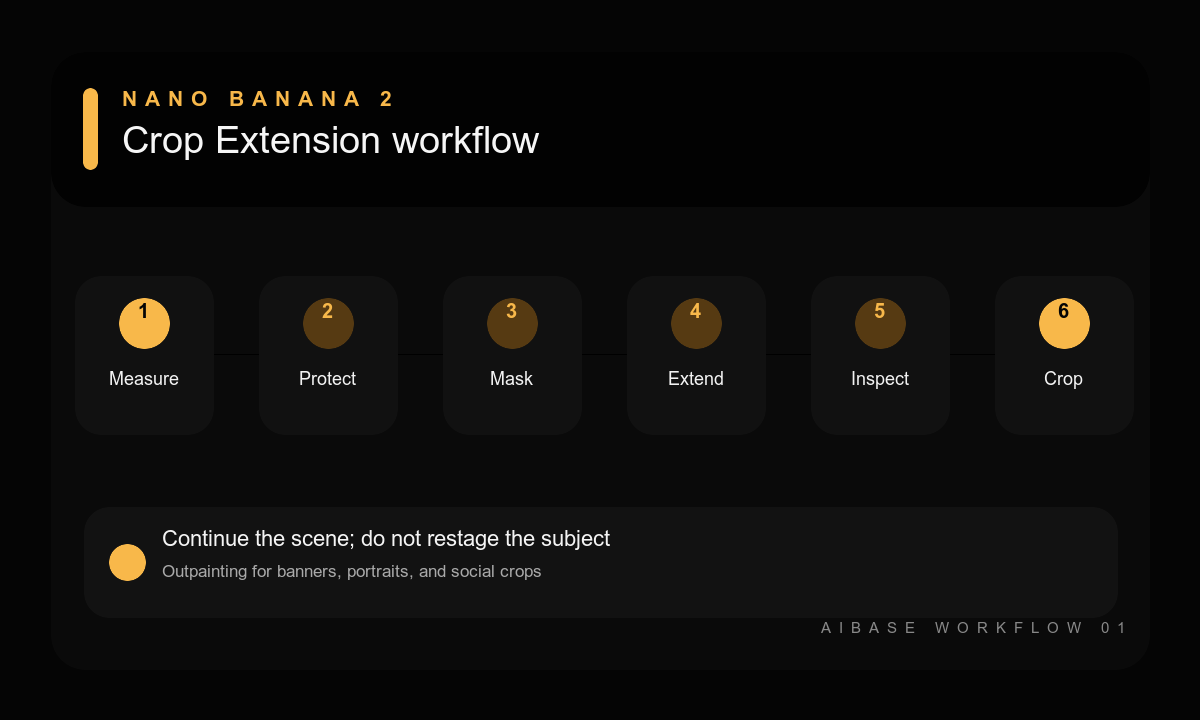
- Record the destination size, safe areas, and which edges need new pixels before opening the generator.
- Prepare a clean source and protect the subject, contact shadow, reflections, typography, and structural lines.
- Extend one direction first when the canvas change is large, matching perspective and light before adding another side.
- Describe the new area with concrete surfaces, depth cues, and negative-space placement rather than broad style words.
- Inspect the boundary at full resolution for seams, repeated objects, bent lines, lighting shifts, and subject drift.
- Crop to the final placement, compare against the source, and retain the untouched original for approval.
Example prompt variants
- Keep the exact skincare bottle, label zone, cap, contact shadow, beige stone, and left-side window light; extend only the canvas to the right for a 16:9 banner, continuing the stone surface and soft wall gradient with clean right copy space.
- Keep the exact portrait face, hair, shoulders, clothing, pose, skin tone, and studio light; extend upward and sideways to 4:5, continuing the neutral paper backdrop with natural falloff; do not generate new body parts.
- Keep the exact plated dessert, plate rim, crumbs, table perspective, and overhead shadow; extend the wooden table to a square crop, matching grain scale and direction with uncluttered upper-left space.
Quality checklist
- The original subject, scale, details, colors, and existing pixels remain unchanged.
- Perspective lines, surface texture, grain, light direction, shadows, and depth continue naturally.
- No seam, mirrored patch, duplicate object, bent edge, or abrupt color shift is visible.
- The final crop contains the required safe area without weakening subject prominence.
- The output has been compared side by side with the source at full resolution.
Mistakes to avoid
- Asking to make the image wider without naming the target ratio or extension side.
- Describing a new scene so broadly that the model restages or resizes the subject.
- Extending several complex edges in one pass instead of solving the largest seam first.
- Reviewing only a thumbnail and missing texture repetition, label drift, or a subtle boundary.
Related AIBase pages
- Extend an image with Nano Banana 2
- Use controlled image-to-image prompts
- Change a background while keeping the subject
Practical next step
Open the most relevant AIBase generator, run one narrow prompt first, and save the best result before adding more constraints. The fastest way to improve output quality is to compare one variable at a time: subject, camera, background, lighting, then final polish.