
Nano Banana 2 Prompts to Remove Background Color Spill from Product Photos
Neutralize green-screen, colored-card, and bright-backdrop spill on authorized product edges while preserving real material color, transparency, reflections, and package truth.
Quick answer
Use a verified color reference for the product, then identify exactly where the previous backdrop contaminated edges, translucent parts, polished metal, glass, or pale surfaces. Ask Nano Banana 2 to neutralize only the reflected background hue while preserving the product’s real base color, material tint, intentional reflections, transparency, label, silhouette, and shadow. Color spill correction must not become recoloring: compare the edit with a calibrated reference and keep naturally colored transmitted light in clear or translucent materials when it is physically correct.
Who this guide is for
Ecommerce photographers, retouchers, studios, brands, and marketplace teams correcting green, blue, magenta, or saturated-paper spill in authorized packshots before background removal or compositing.
Recommended model
| Use case | Recommended model | Why |
|---|---|---|
| This workflow | Nano Banana 2 image-to-image for a bounded edge and reflection correction | Reference-led editing can target a narrow contaminated region, but a real product sample or approved color target must decide which hue is unwanted and which material color is authentic. |
AIBase is an independent creative platform. Model names are shown only to identify supported underlying technologies and workflow choices.
Prompt template
Use the uploaded authorized [SKU and colorway] photo as the exact source. Verified product color under neutral light: [specific reference]. Remove only the unwanted [green/blue/magenta] background spill visible at [precise edges, reflective bands, or translucent zones]. Preserve exact silhouette, dimensions, material base color, texture, gloss, transparency, refraction, intentional neutral highlights, package print, every existing word and mark, hardware, seams, contact shadow, camera, crop, and resolution. Rebuild physically plausible neutral edge light matching [approved light direction]. Do not recolor the product, whiten translucent material, erase intentional colored parts, flatten reflections, change labels, sharpen globally, add text, or alter any unaffected region.
Step-by-step workflow
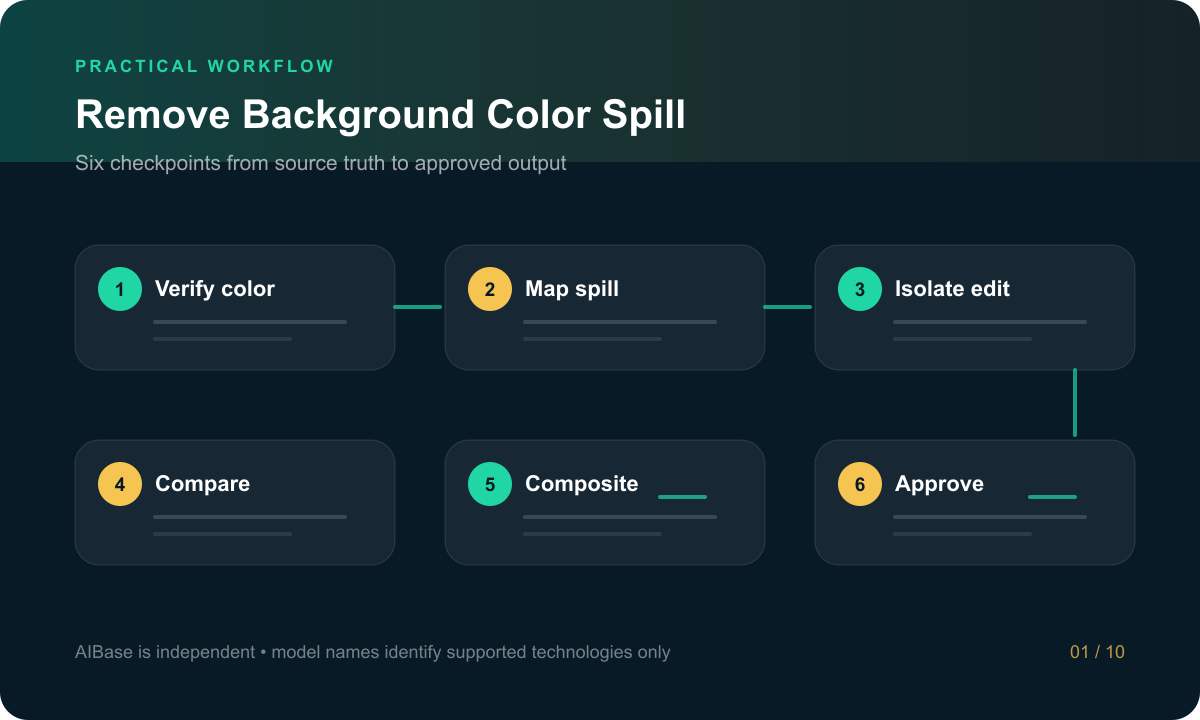
- Confirm SKU, colorway, finish, transparency, approved product photography, and a neutral-light reference such as a color target, sample shot, or supplier-approved swatch.
- Map unwanted spill separately across opaque edges, glossy reflections, metal, glass, translucent plastic, white areas, shadow, and background so each material receives a plausible correction.
- Run one localized correction on the clearest affected region first; protect labels, logos, seams, texture, intentional color accents, and the source silhouette from global restyling.
- Compare source, edit, neutral reference, and intended destination background at full size; inspect edge halos, gray balance, reflection continuity, refraction, and shadow color.
- Composite onto the final background and check that the corrected edge accepts the new environment light without a dark fringe, chalky cutout, missing transparency, or residual green or magenta rim.
- Export from one approved master with color profile intact, preserve the unedited source and correction notes, and have the product owner approve color-critical listings.
Example prompt variants
- Remove only the green-screen spill from the outer rim and handle of this white ceramic mug, preserve warm glaze, blue printed mark, tiny pinholes, neutral highlight, contact shadow and exact crop; no bright-white recolor or edge smoothing.
- Neutralize magenta paper reflection only along the lower chrome band of this authorized cosmetic jar, preserve mirror curvature, silver tone, rose product color, label, cap seam and tabletop reflection; no global desaturation.
- Remove blue backdrop spill from the clear bottle shoulders and outer glass edges while preserving the verified amber liquid, glass thickness, refraction, transparent highlights, embossed mark, cap, label and shadow.
Quality checklist
- SKU, colorway, approved neutral reference, material tint, intentional accents, finish, transparency, package print, and destination background are verified.
- Only contaminated edge light or reflection changed; silhouette, dimensions, texture, gloss, seams, hardware, label, words, marks, and shadow remain source-faithful.
- Opaque, metallic, glass, glossy, matte, and translucent regions retain physically plausible reflection, refraction, transmission, and edge contrast.
- No green or magenta fringe, gray patch, chalky transparency, clipped highlight, muddy shadow, cutout halo, global recolor, or invented detail remains.
- Source, color target, prompt, corrected master, destination composite, comparison, approval, profile, and exports are traceable.
Mistakes to avoid
- Using ‘remove all color’ and stripping the product’s authentic tint, colored reflections, transparent transmission, or warm material character.
- Correcting the whole object when spill exists only on one edge, causing labels, finishes, shadows, and neutral highlights to drift.
- Treating glass, chrome, glossy plastic, matte paper, and translucent resin as the same surface during correction.
- Approving on a white canvas only and missing a halo, clipped transparency, or residual spill that becomes obvious on the real destination background.
Related AIBase pages
Practical next step
Open the most relevant AIBase generator, run one narrow prompt first, and save the best result before adding more constraints. The fastest way to improve output quality is to compare one variable at a time: subject, camera, background, lighting, then final polish.