
Nano Banana 2 Prompts to Fix Product Photo Perspective Without Changing the Product
Correct converging edges and tilted product photos with Nano Banana 2 while preserving verified geometry, labels, materials, crop intent, and an auditable source image.
Quick answer
Use the approved source as geometry evidence, name the exact vertical or horizontal lines that should become parallel, and lock the product before asking for a bounded perspective correction. Correct one axis at a time and compare against known dimensions so a straighter image does not become a subtly redesigned product.
Who this guide is for
Marketplace sellers, catalog teams, resellers, photographers, and retouchers correcting phone-camera tilt, keystone distortion, or a slightly off-center package shot when the real product must remain verifiable.
Recommended model
| Use case | Recommended model | Why |
|---|---|---|
| This workflow | Nano Banana 2 image-to-image | Perspective repair is a narrow reference-led edit: the source should remain authoritative while the workflow changes projection and reconstructs only the small exposed background areas. |
AIBase is an independent creative platform. Model names are shown only to identify supported underlying technologies and workflow choices.
Prompt template
Use the uploaded authorized product photo as the exact source. Correct only the [vertical/horizontal] perspective so [named left and right edges] are parallel and the [top/front] plane reads square to the camera. Preserve the exact product proportions, width-to-height ratio, silhouette, corners, thickness, openings, hardware, label, typography, logo placement, color, material texture, reflections, wear, camera height, lighting, shadow direction, and background color. Reconstruct only the small background wedges exposed by the correction. Keep [intentional three-quarter depth cue]. Do not make the product symmetrical, front-facing, slimmer, taller, cleaner, relit, recolored, or newly rendered; do not invent hidden surfaces, text, parts, or packaging details.
Step-by-step workflow
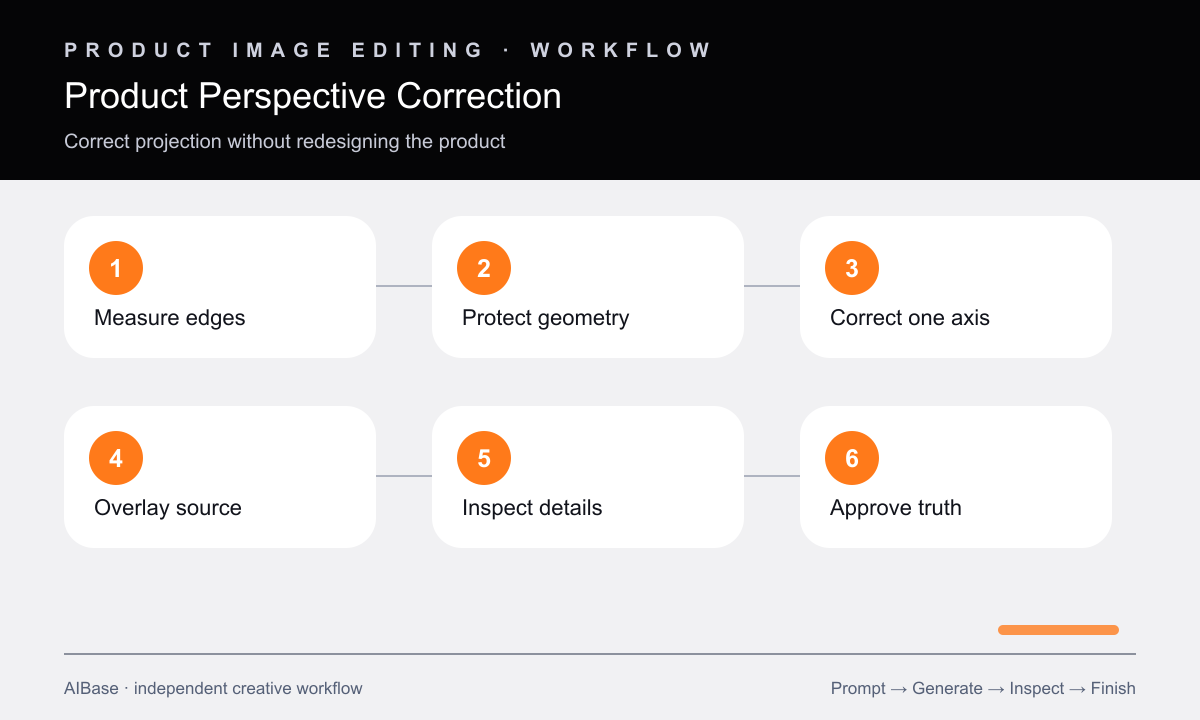
- Mark two trustworthy edges and record a known proportion or measurement before editing; do not use a warped label or soft fabric edge as the only guide.
- Classify the issue as rotation, vertical keystone, horizontal keystone, lens distortion, or a genuinely angled product because each needs a different correction.
- Duplicate the approved source, list protected geometry and surface details, and request only one axis correction in the first pass.
- Generate a restrained edit and overlay it on the source at equal scale, aligning the product center before judging edge movement.
- Measure the known ratio, inspect labels and seams at full size, and check newly exposed background areas for repeated or smeared texture.
- Approve only when projection is cleaner and the physical product remains truthful; use a conventional perspective tool when exact dimensions are critical.
Example prompt variants
- Correct only the inward lean of the left and right carton edges so they are parallel; retain the slight visible top plane, exact box ratio, printed label, fold lines, matte paper texture, tabletop shadow, and crop.
- Level the appliance front panel and correct mild horizontal keystone while preserving exact width, knob spacing, vent geometry, logo zone, brushed-metal grain, reflections, three-quarter depth, and background.
- Straighten the framed print by aligning its outer verticals and top edge; preserve frame thickness, artwork pixels, glass glare, corner wear, wall color, hanging shadow, and natural off-center camera position.
Quality checklist
- The named edges are parallel or level without erasing the intentional depth cue of the original camera angle.
- Known ratios, part spacing, silhouette, thickness, corners, labels, and hardware still match the approved product.
- Typography, logos, seams, grain, reflections, wear, light direction, and shadows have not been redrawn or beautified.
- Only expected background wedges changed, with no cloned patterns, halos, warped table lines, or implausible negative space.
- The edit, original, prompt, measurements, and reviewer decision are retained together for audit and fallback.
Mistakes to avoid
- Asking to make the product perfectly straight without distinguishing camera rotation from keystone or an intentionally angled object.
- Using visual neatness as proof of accuracy when proportions, panel spacing, packaging folds, or label placement changed.
- Correcting both axes, relighting, background cleanup, and shadow replacement in one pass, making drift impossible to isolate.
- Using generative correction for dimension-critical evidence when a measured conventional transform is the safer tool.
Related AIBase pages
- Open Nano Banana 2 image-to-image
- Remove glare from a product photo
- Add a realistic product shadow
- Change a background while keeping the subject
Practical next step
Open the most relevant AIBase generator, run one narrow prompt first, and save the best result before adding more constraints. The fastest way to improve output quality is to compare one variable at a time: subject, camera, background, lighting, then final polish.