
Nano Banana 2 Prompts to Remove Glare from Product Photos
Remove distracting glare from product photos with Nano Banana 2 while preserving real highlights, material cues, labels, geometry, color, and an auditable ecommerce source.
Quick answer
First decide whether the bright area is unwanted glare or a highlight that explains the material. Mark only the distracting reflection, lock every product detail, and ask Nano Banana 2 to reconstruct that small region from neighboring texture while retaining enough specular light for glass, metal, or glossy plastic to remain believable.
Who this guide is for
Ecommerce retouchers, catalog teams, resellers, photographers, and marketplace operators correcting a localized light reflection on an authorized product image without reshooting the whole catalog.
Recommended model
| Use case | Recommended model | Why |
|---|---|---|
| This workflow | Nano Banana 2 image-to-image | This is a bounded reference-led correction: the approved source remains the truth and only a named glare region should change, making an image-to-image workflow more appropriate than generating a replacement product. |
AIBase is an independent creative platform. Model names are shown only to identify supported underlying technologies and workflow choices.
Prompt template
Use the uploaded authorized product photo as the exact source. Remove only the distracting [shape and location] glare on [named product surface]. Reconstruct that area from the adjacent verified [color, texture, printing, transparency, or grain]. Preserve the exact silhouette, dimensions, perspective, camera, crop, product color, material character, label, typography, logo placement, seams, hardware, edges, dust pattern, background, contact shadow, reflections outside the edit region, and exposure. Retain [small edge highlight or controlled reflection] so the material still reads as [glass/metal/glossy plastic]. Do not redraw, smooth, relight, recolor, move, resize, clean other areas, invent hidden label content, or remove functional material highlights.
Step-by-step workflow
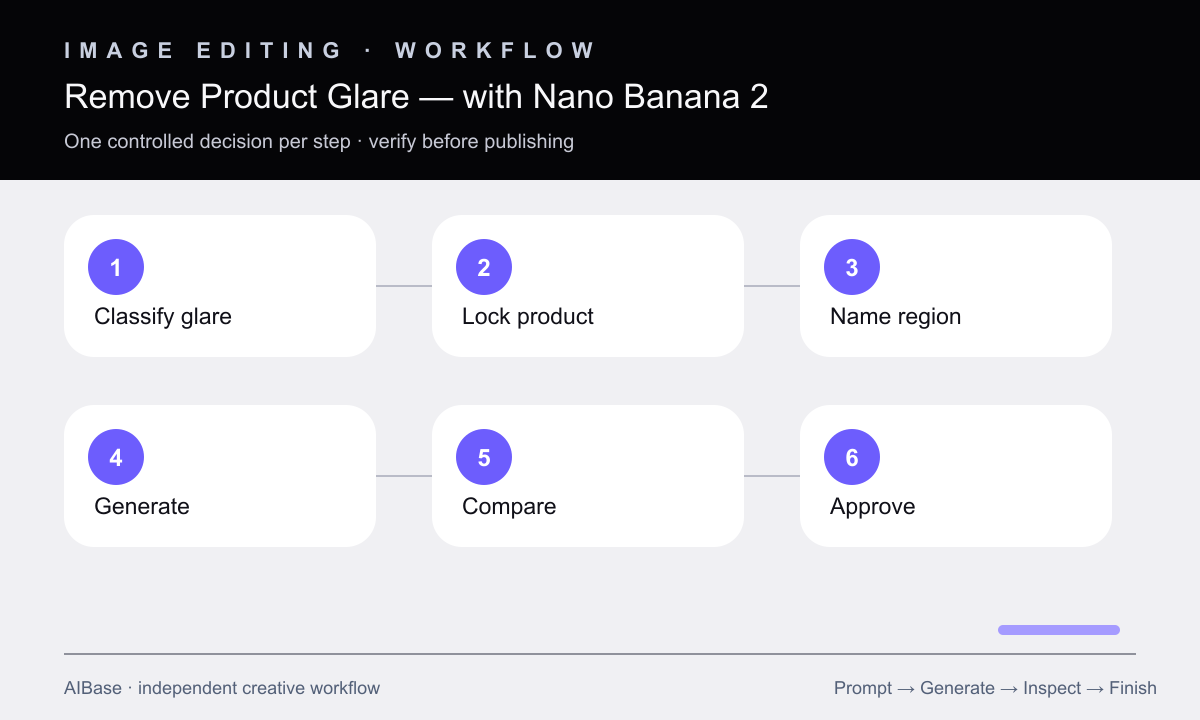
- Classify each bright area as clipped glare, readable reflection, intentional edge light, metallic highlight, transparent-surface cue, or label obstruction before editing.
- Duplicate the approved source and describe one precise edit region by surface, position, shape, and boundary rather than requesting general cleanup.
- List protected product truth: geometry, label, typography, color, texture, seams, hardware, transparent areas, background, shadow, and all reflections outside the region.
- Generate the smallest correction first, then compare the result and source at identical scale with a difference overlay or rapid toggle.
- Inspect whether the repaired patch repeats texture, invents label detail, flattens curvature, changes color, or removes the highlight needed to explain the material.
- Keep the original, edited file, prompt, and review note together; use manual retouching when the glare covers legally important text or unrecoverable product information.
Example prompt variants
- Remove only the rectangular softbox glare crossing the lower-right glass jar label; rebuild the verified cream label color from adjacent pixels, keep all readable typography and retain a narrow curved highlight on the jar edge.
- Reduce only the blown white reflection on the top-left stainless-steel appliance panel; restore brushed horizontal grain and preserve buttons, seams, logo zone, perspective, and a soft highlight that still describes metal curvature.
- Remove the photographer-shaped reflection from the center of the glossy black bottle while preserving the bottle silhouette, cap, printed label, dark tonal separation, floor reflection, and two slim studio edge lights.
Quality checklist
- Only the named glare region changed; geometry, label, typography, color, texture, camera, crop, background, shadow, and other reflections match the source.
- Glass, metal, lacquer, or glossy plastic still has physically plausible highlights and does not look matte or cut out.
- The reconstructed region follows surface curvature, perspective, grain, transparency, and lighting without repeating or smeared texture.
- No covered label text, compliance mark, serial number, ingredient, control, or feature was guessed from incomplete evidence.
- The edit passes both full-size comparison and the intended marketplace thumbnail, with the source retained for audit and fallback.
Mistakes to avoid
- Requesting remove all reflections and accidentally destroying the light cues that make a glossy material readable.
- Editing the entire product when only one small glare patch is distracting.
- Accepting invented label letters or product features where the glare hid the real information.
- Publishing a smooth but materially flat repair without comparing it against the approved source at full resolution.
Related AIBase pages
- Open Nano Banana 2 image-to-image
- Add a realistic product shadow
- Remove an object from a photo
- Create transparent product backgrounds
Practical next step
Open the most relevant AIBase generator, run one narrow prompt first, and save the best result before adding more constraints. The fastest way to improve output quality is to compare one variable at a time: subject, camera, background, lighting, then final polish.