
Nano Banana 2 Prompts to Straighten Crooked Product Labels Without Redesigning Them
Use Nano Banana 2 to correct a slightly crooked product label while preserving approved packaging, typography, colors, reflections, and product geometry.
Quick answer
Use an authorized high-resolution packshot and define the label panel as the only editable region. Ask for a small planar alignment correction while locking the container, artwork, spelling, line breaks, colors, print texture, highlights, shadows, and crop. If any character changes, restore the approved label from source artwork in an image editor instead of accepting generated text.
Who this guide is for
Ecommerce retouchers, catalog teams, small brands, agencies, and marketplace operators correcting minor label placement or capture-angle issues on bottles, jars, cans, boxes, and pouches with approved packaging artwork.
Recommended model
| Use case | Recommended model | Why |
|---|---|---|
| This workflow | Nano Banana 2 image-to-image | A bounded image-editing pass is useful when the source packshot is already correct and only the label plane needs a modest visual correction, with final text fidelity verified against approved artwork. |
AIBase is an independent creative platform. Model names are shown only to identify supported underlying technologies and workflow choices.
Prompt template
Use the uploaded authorized packshot as the exact source. Edit only the visible [front/side] label panel: correct its slight [clockwise/counterclockwise] tilt and align it naturally to the container's existing perspective and curvature. Preserve the exact product shape, cap, seams, label size, die-cut edge, artwork layout, logo, spelling, line breaks, font appearance, colors, barcode, legal marks, material, print texture, highlights, reflections, contact shadow, background, crop, resolution, and every area outside the label. Do not rewrite, sharpen into invented letters, flatten container curvature, expand the label, change claims, add text, replace packaging, alter lighting, or clean unrelated defects. Return one realistic retouch for comparison with the source.
Step-by-step workflow
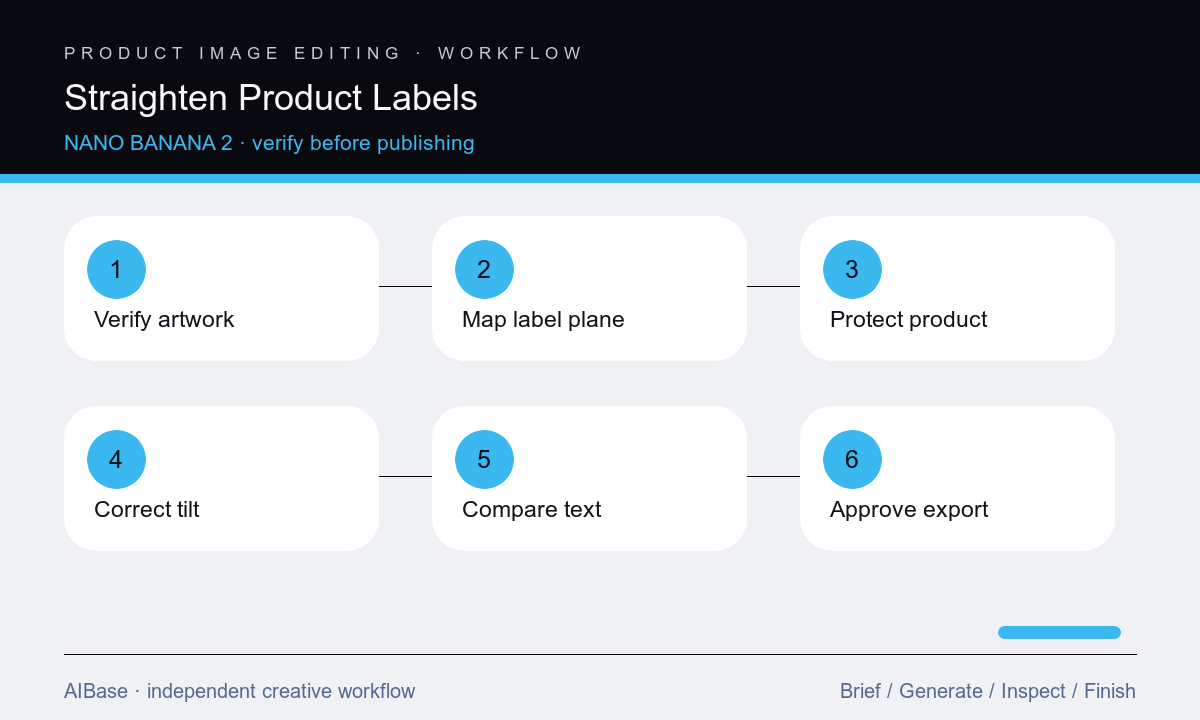
- Confirm that the photographed packaging and label artwork are current, approved, and permitted for editing; keep the original packshot and flat artwork available as truth references.
- Measure the visible tilt, label boundaries, container centerline, curvature, perspective, reflections, and any occlusion, then decide whether the issue is label placement or whole-camera perspective.
- Mask only the label panel with a small feather and write the protected product, typography, lighting, shadow, background, and crop details before describing the correction.
- Generate one low-amplitude correction; if the label needs major reconstruction or the text changes, stop and use a manual perspective warp with the approved artwork.
- Compare source and result at 100 percent for every character, logo contour, line break, regulatory mark, label edge, reflection, product outline, and background pixel near the mask.
- Export a marketplace-sized copy from the approved master, keep an audit pair of source and retouch, and route packaging or claim questions to the responsible reviewer.
Example prompt variants
- Straighten only the slightly clockwise paper label on this amber jar, follow the jar curvature, preserve exact artwork, spelling, colors, paper grain, rim, glass reflections, shadow, and white background; no cleanup elsewhere.
- Correct only the front-panel skew on this stand-up pouch so its approved rectangular label follows the existing pouch plane; preserve all text, zipper, folds, material highlights, silhouette, crop, and floor shadow.
- Align only the narrow wrap label on this beverage can by a subtle counterclockwise adjustment, preserve can geometry, condensation, metallic reflection, exact label width, artwork, barcode, legal line, and camera perspective.
Quality checklist
- The result is compared with the current approved packshot and flat label artwork, not with memory or an older SKU.
- Every letter, numeral, punctuation mark, line break, logo, color, barcode, certification, and claim remains exact and legible at delivery size.
- The label follows the original container plane or curvature without changing product silhouette, seams, cap, folds, reflections, or perspective.
- The edit boundary shows no halo, repeated texture, smeared print, doubled edge, altered shadow, or unrelated cleanup.
- Source, mask, prompt, result, reviewer, approval, and final export remain traceable for later packaging updates.
Mistakes to avoid
- Asking to make the label perfect and letting the model redesign typography, claims, barcode, or packaging proportions.
- Correcting a whole-photo perspective problem by warping only the label until it no longer follows the container surface.
- Approving at fit-to-screen size and missing one changed character, shifted legal line, or invented certification mark.
- Using generative repair when a manual warp of approved artwork would be faster, exact, and easier to audit.
Related AIBase pages
- Open Nano Banana 2 image-to-image
- Remove glare from product photos
- Fix product-photo perspective
- Create transparent-background product photos
Practical next step
Open the most relevant AIBase generator, run one narrow prompt first, and save the best result before adding more constraints. The fastest way to improve output quality is to compare one variable at a time: subject, camera, background, lighting, then final polish.