
Nano Banana 2 Sticker Residue Removal Prompts for Clean Product Photos
Remove price-sticker residue, tape marks, and adhesive smears with Nano Banana 2 while preserving exact packaging, print, finish, reflections, and surface texture.
Quick answer
Mask only the residue, tape shadow, or adhesive smear and describe the clean surface from an undamaged nearby area. Protect every printed character, label edge, seam, coating, grain, reflection, and contact shadow. Generate one repair at a time, then compare at 100% zoom; if residue crosses important print, obtain a clean packaging reference instead of asking the model to guess missing artwork.
Who this guide is for
Ecommerce retouchers, marketplace sellers, resellers, catalog teams, and small brands cleaning authorized packshots after temporary price labels, warehouse tape, protective film, or handling marks were removed.
Recommended model
| Use case | Recommended model | Why |
|---|---|---|
| This workflow | Nano Banana 2 image-to-image with a tight local mask | A bounded edit is appropriate when most of the source image is already correct and only a small contaminated surface region should be reconstructed. |
AIBase is an independent creative platform. Model names are shown only to identify supported underlying technologies and workflow choices.
Prompt template
Use the uploaded authorized product photo as the exact source. Remove only the masked [price-sticker residue / tape shadow / adhesive smear] from [precise location]. Reconstruct the area from the nearest verified clean surface, matching exact [material], color, grain, gloss or matte finish, print boundary, curvature, light direction, highlight, reflection, and compression texture. Preserve product silhouette, dimensions, label, every readable character, logo, barcode, seam, edge, hardware, transparent area, shadow, background, crop, and all unmasked pixels. No new text, guessed artwork, smoothing outside the mask, color shift, relighting, reshaping, extra cleanup, watermark, or invented claim.
Step-by-step workflow
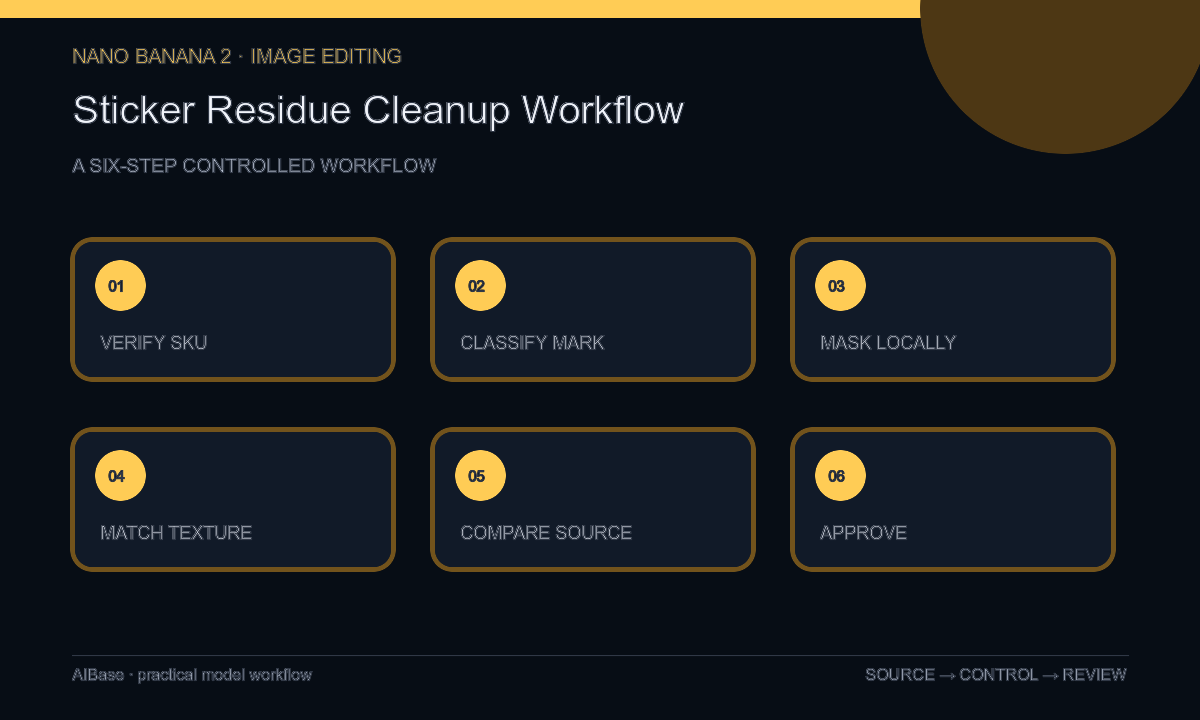
- Confirm the exact SKU and packaging version, then retain an untouched source plus any clean reference showing the obscured material or print.
- Classify the defect as raised adhesive, discoloration, torn paper, tape shadow, coating damage, or missing printed information; only the first four are safe to infer from nearby texture.
- Draw a tight mask around the contaminated pixels without crossing label characters, seams, reflections, or package edges unless a verified clean reference supports reconstruction.
- Describe the replacement surface by material, finish, curvature, grain, color, highlight, and neighboring print boundary, and request no changes outside the mask.
- Generate small variants, then compare source and output at full resolution for text, color, shape, texture repetition, reflection continuity, edge halos, and lost surface wear.
- Approve against the physical SKU or current packaging artwork, export the smallest necessary edit, and retain the source, mask, reference, prompt, and reviewer record.
Example prompt variants
- Remove only the oval price-sticker adhesive from the lower-right matte carton panel; match the verified charcoal paper grain and soft side highlight, preserve all gold foil characters, fold lines, corners, shadow, and unmasked pixels.
- Clean the narrow transparent tape shadow from the approved glass jar lid, matching brushed aluminum direction and highlight falloff; preserve lid geometry, embossing, glass, label, liquid level, reflections, and background.
- Remove three small adhesive specks from the white appliance side panel using adjacent enamel texture, preserve ventilation slots, warning-label boundary, cable, product edges, exposure, contact shadow, and exact neutral color.
Quality checklist
- The exact SKU, packaging version, silhouette, color, text, logo, barcode, seams, hardware, and label placement remain unchanged.
- The repaired patch matches surrounding material, grain, gloss, curvature, lighting, reflections, wear, and image noise without a repeated texture stamp.
- No character, artwork, certification, warning, batch mark, surface edge, transparent region, or shadow was reconstructed from guesswork.
- Mask boundaries show no blur, halo, abrupt tone change, or over-cleaning when inspected at 100% zoom.
- The original, clean reference, mask, prompt, output, packaging approval, and export remain traceable.
Mistakes to avoid
- Using a broad cleanup prompt that removes intentional texture, wear, embossing, small print, or reflective cues with the residue.
- Asking the model to recreate covered label copy, barcode data, legal text, or artwork without an exact approved reference.
- Masking across a carton edge or curved highlight and creating a flat patch that changes product geometry.
- Approving from a thumbnail without comparing color, grain, print, and reflections against the current physical SKU.
Related AIBase pages
- Open Nano Banana 2 image editing
- Remove dust and fingerprints
- Remove product-photo glare
- Straighten a product label
Practical next step
Open the most relevant AIBase generator, run one narrow prompt first, and save the best result before adding more constraints. The fastest way to improve output quality is to compare one variable at a time: subject, camera, background, lighting, then final polish.