
Veo 3.1 Fast Before-and-After Video Prompts
Plan short before-and-after concepts with Veo 3.1 Fast using matched frames, one visible change, restrained motion, a clean transition, and truthful labels added in editing.
Quick answer
A clear before-and-after clip needs a matched camera, subject position, crop, and light, plus one visible change that can be represented truthfully. For stronger control, create separate before and after shots from approved references and build the transition and labels in an editor.
Who this guide is for
Social, ecommerce, home, beauty, fitness, and creator teams previsualizing reveal formats, room styling, organization, color changes, packaging updates, and other transformations that can be shown without unsupported outcome claims.
Recommended model
| Use case | Recommended model | Why |
|---|---|---|
| This workflow | Veo 3.1 Fast for rapid short-shot exploration | Its short 4-, 6-, and 8-second options fit fast testing of matched compositions, reveal timing, and transition directions before selected concepts move into editing or production. |
AIBase is an independent creative platform. Model names are shown only to identify supported underlying technologies and workflow choices.
Prompt template
Create a [4/6/8]-second [aspect ratio] before-and-after concept for [truthful change]. Keep [subject identity], [camera position], [lens feel], [framing], [background anchors], [scale], and [lighting direction] matched. Opening state: [verified before state]. Animate only [one transition action] at [time or cue]. Final state: [verified after state]. End with a stable matched frame and [copy-safe zone]. No unverified result, body reshaping, health or performance implication, new product feature, extra object, changing camera, flicker, readable text, badge, price, logo, watermark, or repeated transition.
Step-by-step workflow
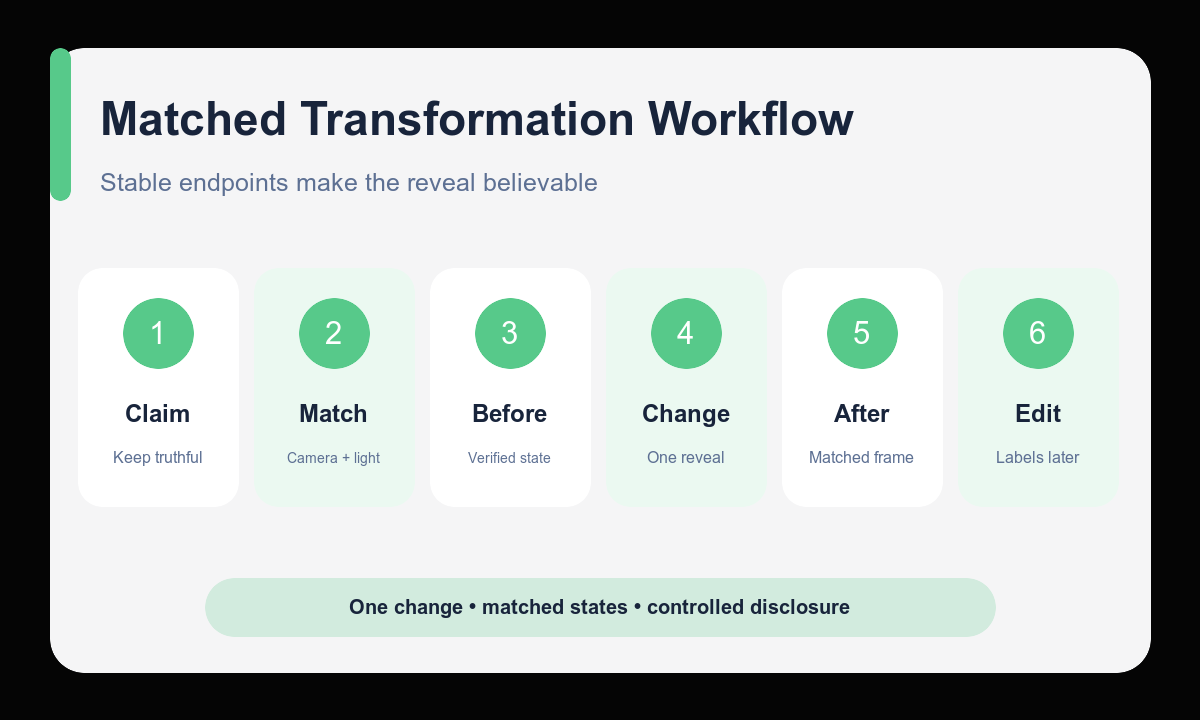
- Define the exact change and remove any outcome claim you cannot substantiate.
- Prepare matched before and after references when a real subject, product, or location must remain accurate.
- Lock camera, crop, subject scale, anchor positions, and lighting before describing the change.
- Choose one simple reveal mechanism such as a wipe, occlusion, turn, lid close, or light pass.
- Generate or select stable endpoints, then assemble timing, labels, and disclosure in an editor.
- Review the final sequence for match, truthfulness, accessibility, and any category-specific advertising requirements.
Example prompt variants
- Six-second 9:16 desk-organization concept, camera and desk edges locked, opening shows verified clutter arrangement, one hand passes close to lens as transition, ending shows the approved organized layout, stable top copy zone, no product claims.
- Four-second square packaging-color concept, bottle silhouette, cap, label zone, pedestal, camera, and light fixed; one soft shadow wipe reveals the approved alternate carton color; finish on matched front frame.
- Eight-second 16:9 room-styling concept, architecture, windows, camera, and daylight fixed; a curtain crosses frame once and reveals the approved furniture and textile arrangement; no structural change or value claim.
Quality checklist
- Before and after states use matched camera, crop, scale, anchor positions, and light.
- Only the intended, verified change occurs and the subject remains recognizable.
- The transition is singular, readable, and free from flicker or geometry jumps.
- Labels, timing, offer copy, and disclosure are added accurately in editing.
- No health, body, performance, financial, or product outcome is implied without support.
Mistakes to avoid
- Using before-and-after framing for a claim the visual cannot substantiate.
- Changing camera, lighting, subject scale, and environment along with the target change.
- Packing multiple reveals and transitions into a short generation.
- Relying on generated in-frame text instead of controlled editorial labels.
Related AIBase pages
Practical next step
Open the most relevant AIBase generator, run one narrow prompt first, and save the best result before adding more constraints. The fastest way to improve output quality is to compare one variable at a time: subject, camera, background, lighting, then final polish.